Posts

Showing posts from 2014

Closed-loop DC motor to act as a stepper motor

Image
One of the things that I hate the most about 3D printing is that these machines are usually working in open loop and, sometimes, a tiny error happens that ruins a long print. Most 3D printers use one or more stepper motors to move each axis. Steppers are a good solution to the problem, they are easy to control and have lots of torque (compared to similar sized DC motors) but they may skip a step occasionally. The problem then is the print head is no longer where it is supposed to be but slightly off. From there on the print is misaligned and most likely will be useless. Any type of motor can be equipped with an encoder to check its location at any time. However that adds an additional cost to the equipment and requires extra software to handle this new information. One idea that has been mentioned many times in RepRap forums is that if steppers were replaced by DC motors with encoders that will allow the accurate position control that offer the steppers, the machines could be mad

Loading TinyG2 in the Arduino DUE

Image
I have been intrigued for a while with TinyG controller and their S-shaped speed curves. It is an evolution from simpler trapezoidal speed patterns used by GRBL software and by most 3D printer firmwares out there too. However, TinyG (besides a South Korean music group) is not designed to work on a regular Arduino but over more powerful Atmel processors, the XMega series. While the software is open source, it does not help if you do not have the right processor. But lately I am giving a course where I have borrowed an Arduino DUE, which happens to be supported by TinyG project too. Uploading the code has been a bit of challenge, partly due to my attempt of using a USB cable with broken data wires (I did not know that as I use it for charging my cellphone). But even with a good cable, the upload process, at least using OSX was a bit of a challenge. It all comes down to a not entirely cooked script from their github . As I am not familiar with ARM development conventions, I see

Another one bitten by the bug

Image
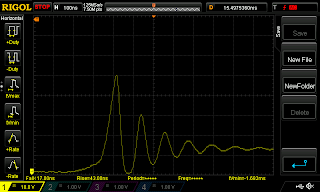
While I have been doing electronics since I was a kid I never owned an oscilloscope before. At a local meeting of Arduino users a colleague mentioned me there was a very good offer of a four channel sampling oscilloscope. Not that I need to use it very often but I was curious enough to see how instruments have evolved lately I decided it was about time to have my own scope so it was kind of a birthday gift I bought to myself (if that makes any sense). First thing I have measured, just because it's right next to me is the the ringing of my 3D printer's hotend PID regulator output. It has been mentioned voltages can get pretty high over there in RAMPS boards and boy, that is true. At around a 50-volt spike is produced when the load is switched off. And the real value can only be appreciated if you freeze the sampled signal and expand widely the time axis, as the spike duration is below 1us. I guess total energy is so small the MOSFET is not really damaged (as it has been sitt

VFD control with Arduino using RS485 link

Image
Variable Frequency Drives ( VFD ) allow the control of spindles so speed can accurately be controlled and a detailed acceleration profile for the spindle and reverse rotation can all be handled. In essence a VFD is an three phase inverter for three-phase AC motor. I am using a popular (I mean cheap) Chinese VFD and though the reference manual is not great, I could see there is a built-in RS-485 port. I usually control the start, stop and speed selection using the keyboard on the unit but I thought it will be more useful if I could control everything from the same Arduino is doing our CNC table control. Some cheap RS-485 off eBay and some lines of code later, I can start, stop and change the speed from an Arduino. What a cool thing to have! Some configuration of your VFD are needed before you can use it like that.  You need to set PD163=1 (I am using address 1 in the code). PD=164=1 (for setting serial to 9600bps) and PD165=0 (for using ASCII and 8N1 character format)

First steps with ESP8266 wifi module

Image
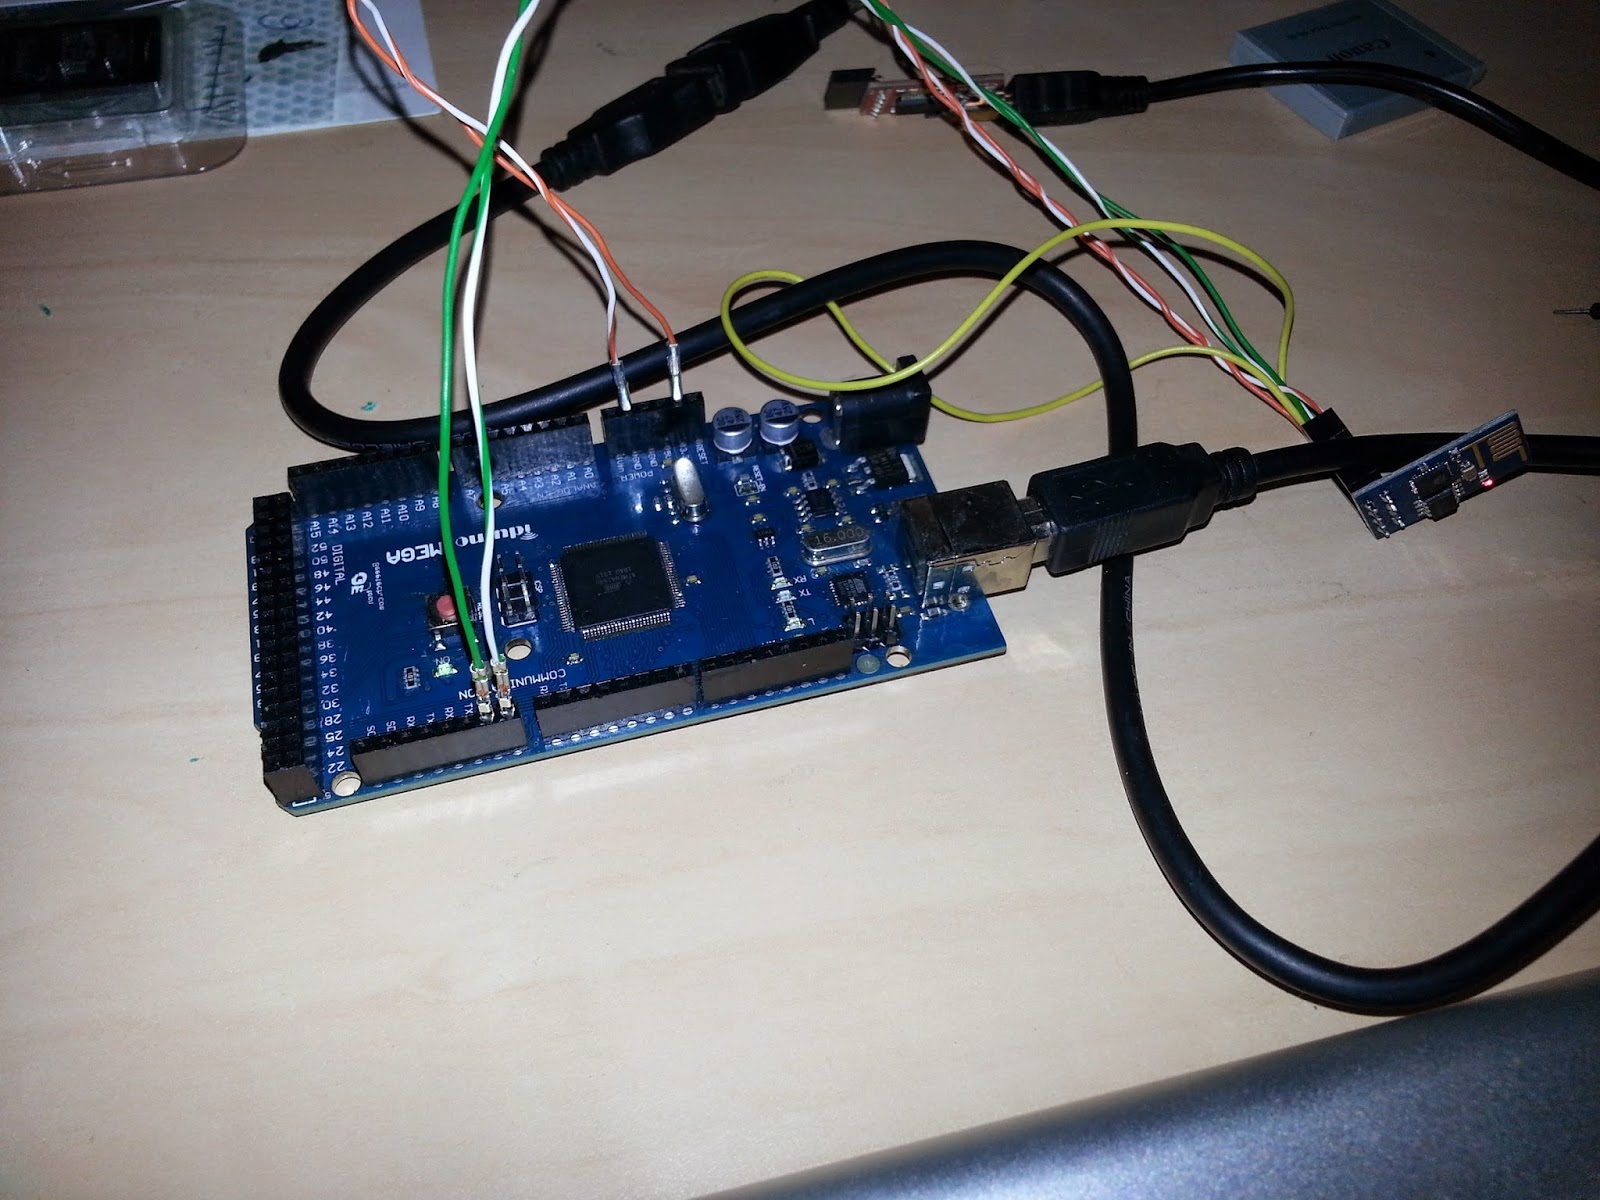
Some weeks ago it was mentioned in hackaday.com a new wifi module was available at a very tempting price (I paid $10 for two ESP8266  units shipped). It is a full SoC system which firmware can be updated. My main interest was to use it with Arduino projects and, perhaps, as a way to use my 3D printers wirelessly. The module offers, among other choices (I2C, SPI) a serial connection, running at 115200bps. Getting it to work has been a bit weird, as documentation was not very accurate and I was not paying much attention either. Care has to be taken with power supply as the unit is to be powered at 3.3V and using 5V will probably kill it. Likely it seems that I/O are 5V-tolerant (or so they seem till now). My initial setup has been to use an Arduino UNO as a power supply for the 3.3V and another 3V USB to Serial adapter with one FTDI chip. This way I was able to interact with the board using a serial terminal software (Coolterm). Unfortunately my initial setup was a no go. I ini

The ever shrinking Arduino

Image
The las version of Arduino I bought is the micro. Around the size of the Arduino Pro Mini but featuring a processor that handles the USB port too and costing $7.50. As I bought mine from an Asian online seller off eBay I decided to give a try before providing feedback. Last week I have got trouble with two items I bought on Aliexpress: a set of Kossel linear rails that have rough spots along the rail and a set of hardened chromed smooth rods that are very smooth but bent too. In both cases they first impression was they were ok and I give them the heads up so they could get my money. Unfortunately, on closer inspection I discovered the problems mentioned above and I am still in the process of sorting it out with the sellers. This time I wanted to be quite sure everything worked as expected ... but it did not. I could happily upload new sketches once I selected the Arduino Micro as the target board. But I could not get Blink program to work. After checking Arduino docs about the Mi

Stupidity-R-US

Today, after a long wait, I made my mind to shopping for a brand-new MacBook Air. I went to the Apple store in my city before the summer but I did not like what I was told: They will make me a nice discount for being a university professor but only if I was billed personally. I wanted the machine to be invoiced to my university that would slash the discount seriously. It did not matter that my university was a leading public university in the country. I left the shop shocked and empty handed. After checking with some colleagues it seems that is Apple's usual policy, though nobody was able to explain why. Anyway, after doing some taxes math I saw it was still more convenient for me to charge the bill to my personal expenses account I hold with my employer so I went for it. These is more or less my experience today at the Apple Store in Valencia. Apple rep1 (at the door): How can we help you today Sir? Me: I would like to buy a MacBook Air. Apple rep1: Do you have it reserved

Reading binary STL files in Java

Image
I liked the source code from MaskedRetriever user on github and I assumed it would work ok. It seems it was an attempt to create a self-contained tool for 3D printing but somehow it was left at an early stage. But I liked the fact that source code was documented. My needs were to read STL files and to slice them. As usual you need to get familiar with the different classes involved but it took me not much to get it going. I stripped most of the classes as I was not interested on 3D printing nor on having a GUI for such a tool. However, as soon as I draw the output of the slice process I noticed something was wrong. While the proper slice looked smooth like the image below: What I was obtaining was a bit of a mess, though the general ideal was correct. As it was my first attempt I was not sure where the error might be. After a few tests I realized that the same code would work ok if STL file was ASCII-based but it will fail as above if a binary STL was used instead.  I

More on delta 3D printers

Image
It's been quite busy around here lately. Still, I have managed to build a couple of delta 3D printers with heated beds and develop a couple of ideas that seemed worth trying. One of these ideas is the use of a heated bed. While I can see that some people are moving away from ABS to use just PLA plastic, I do not see how I can use a PLA-only solutions for environments where temperature can be high, like inside of a car or near a hotend or heated bed. Two different types of extrusions and carriages were tested: wheeled carriages over the extrusion resulted in a quieter and more accurate system than rails. But the IGUS guides used had quite play by design. After watching the videos of them working I am not sure they are a good choice for this particular use, though printed parts do not look bad after all. While Johan pioneered the use of force sensing resistors on the bed for probe-less bed detection, I was not pleased with the additional cost these FSR sensors woul

Mobile data services for Japan visitors

On the occasion of a trip to Japan, I had to look for a way to stay connected while on the go. Though most hotels will offer free wifi to guests, having an Internet connection while trying to navigate the city is most welcome. And if you are to believe the claim, Tokyo is the most populated city of the world. It certainly has an impressive public transportation system with many different companies just for the light trains and underground systems. Google Maps seems to be properly in synch with local companies schedules and provided accurate results on how to go from point A to point B within the city. But to be able to use it you need Internet mobile access. And this is where Japan seems a bit odd for the visitor: It seems you cannot buy a prepaid voice or data SIM card unless you are Japanese. Maybe I am missing something here but that was what I learned from my online search. One notable exception seems to be B-mobile VISITOR SIM , which offered pre-paid data service SIM card.

Viewing g-code files in Linux and OSX

Image
Working with CNC machines and 3D printers and developing CAM software myself I need a tool to quickly display the 3D view of any g-code file generated. For a while I have been using EMC2 software on Linux and Pleasant3D in OSX. The former was a bit picky about certain commands that were not understood that would prevent the displaying of a file completely. The latter is ok, but being oriented to 3D printers, it is not very convenient when handling files of several square feet. It works but your viewing ability and angles are a bit limited. After a bit of searching and playing with several potential candidates I have settled with version 0.2.3 of OpenSCAM that I had used in the past on Windows but somehow was not available at the time for OSX or Linux (or I was lazy enough not to try to compile it from the sources myself). Current version worked nicely in OSX and gave me some minor problems in Ubuntu Linux, that could be solved by installing libv8-dev library and doing a soft lin

Delta 3D printers

Since the presentation of the Rostock 3D printer, I have been amazed on the kind of motion that these machines make to print a part. While I have found quite hypnotic the way layers are deposited to create plastic part using fused filament fabrication, when the process is done by a delta robot instead of by a cartesian robot, the show is even more interesting. However the Rostock was a big machine, not compatible with the space I have available at home. But when I saw Richard's 3DR printers, I thought it was a good way for me to venture into the interesting world of this type of printers. Contrary to the Rostock, the 3DR had a small footprint so I built one. But that was just part of the challenge. Delta 3D printers use three vertical parallel carriages linked by a set of rods to a central platform where the hotend is placed. But contrary to some other printers, those vertical axis are not screw-driven but belt-driven, which allows very fast motion. As a result, Delta 3D prin

Of pumps and stepper motors

Image
I have been quite busy lately due to several factors. One of them things not working out as expected. Of course every failure is a learning opportunity and this case, my chance to get familiar with the world of hydraulics and fluid dynamics. As a Computer Scientist, you do not get any training on that matter (other than maybe learning about fans for cooling down electronic parts). I have been working for more than a year on a project where the least I was expecting was to have trouble with what it is eating a lot of my time lately: pushing a viscous fluid in a precise, controlled-way, from a container to the printing area of a 3D-printer we have designed and successfully built as part of our research project. If you are familiar with 3D printing, you can think of us trying to create a reliable paste extruder. There are many open paste extruder designs out there, but many are designed for not so viscous pastes or liquids. Others can handle viscous fluids but only a very small amount

First replication

Image
With some friends we created a project a while ago for developing hardware and software for CNC milling of large 3D sculptures. While one of the ideas was to market the hardware we developed, it does not seem to be a feasible thing to do unless you want to invest a fair amount of cash to get some paperwork done. Not being a fan of paperwork myself and not seeing a clear path to profitability, we have put on hold the idea of marketing such systems. Another way of broadcasting our developments was to make it open source and help people to replicate our system. The problem is that while some people may want to have a cheap CNC machine, many of them are not in the mood of building it themselves. But now we have been working with a company in Rome that is willing to do the extra mile and I am flying over to help them get it working. While we suggested one frame, they have gone more conservative and partially build their hardware around MechMate design, but plan on using our Arduino-b